Getting started with draft.js plugins
Draft.js is a very powerful on its own. But if you've ever used draft js to build apps, you'll know that you quickly end up building a messy, complex app. Draft-js-plugins comes to the rescue! In this post we'll learn how to use draft-js-plugins and how to build our own plugin.
This post is part of a series:- Getting started with draft.js
- Getting started with draft.js plugins (current)
- Draft-js - Saving data to the server
- Draft-js and Redux - the perfect couple
- Draft-js building search and replace functionality
- Best practices when working with draft js
- Drawing on canvas inside a Draft js document
Heads up: To follow along with this tutorial some experience with draft-js would be beneficial. Feel free to stop here and have a look at my other blogpost on getting started with draft js.
Draft.js is a powerful framework for creating rich text editors. But like anything, it comes with draw-backs. Draft.js plugins, the brainchild of the amazing human being that is Nik Graf (aka the nicest man on earth) is a plugin system that makes draft.js development a lot saner.
Draft.js doesn’t encourage modularity by default
The way draft.js is designed doesn’t encourage splitting your editors functionality into modules. As a result, what I’ve seen first hand working on production draft-js codebases is that functionality is often tightly coupled, which makes code hard to read, test and share.
Facebook libraries usually (like react) don’t come with opinions on how you should structure your application. With draft-js being as young as it is there isn’t much out there to guide you on how to structure your application. Draft.js plugins solves this by providing a plugin system. Rather than putting all your functionality into one huge component, plugins encourage you to place your functionality into distinct code buckets that you can just plug into your editor, like this:
<PluginEditor
  editorState={this.state.editorState}
  onChange={this.onChange}
  plugins={[hashtagPlugin, mentionPlugin, linkifyPlugin, dragAndDropPlugin]}
/>
As you can see above, we extend the editors functionality just by handing it a bunch of plugins. By enabling modularity for draft-js, plugins open up a space for the community to share functionality amongst each other.
This is very important for the open source community. Making draft-js functionality modular means we can share our code, and extend our editors by using plugins from other contributors.
Draft.js doesn’t come with a lot of default functionality
This is another problem that plugins solve. Currently, there are 17 (and growing) plugins in the draft-js-plugins repository. They cover use-cases such as emojis, @mentions, autolinking, embedding video, stickers, images and more. The quality of those plugins is pretty high btw, some of them even implement ARIA, the accessibility standard for web-apps. There’s even a decent implementation for tables, which has been deprecated (for now) because it’s hard to maintain (draft.js doesn’t really cater for nested document structure yet).
So by default draft-js-plugins come with a ton of functionality!
Getting started with plugins
So let’s get started using a draft-js plugin. It’s pretty simple really. I’m writing the code for this tutorial alongside the blog post, feel free to follow along here. If you see a commit hash somewhere (that looks like this #321df1rf4ej280fhje2j) it’s a link to the commit related to that particular point in the tutorial.
To bootstrap my little app, I use create-react-app, then I installed the draft-js-plugins-editor dependency.
# create the app with create-react-app
create-react-app plugins-editor

# install all dependencies
cd plugins-editor
yarn

# install draft-js-plugins-editor dependency
yarn add draft-js-plugins-editor@2.0.0-rc2
Then I mount the editor in my App.js component. Here’s how my App.js looks now:
import React, { Component } from 'react';
import { EditorState } from 'draft-js';
import Editor from 'draft-js-plugins-editor';

class App extends Component {
  constructor(props) {
    super(props);
    this.state = {
      editorState: EditorState.createEmpty(),
    }
  }

  onChange = (editorState) => {
    this.setState({
      editorState,
    });
  }

  render() {
    return (
      <Editor
        editorState={this.state.editorState}
        onChange={this.onChange}
      />
    );
  }
}

export default App;
#937bd5b6260a48f83d381d0f6eb7a5b6ed48e491
As common with draft-js, we render the Editor inside a component which manages the editor state. So in our constructor, I create an empty editor state:
constructor(props) {
  super(props);
  this.state = {
    editorState: EditorState.createEmpty(),
  }
}
I render the Editor inside the render method:
render() {
  return (
    <Editor
      editorState={this.state.editorState}
      onChange={this.onChange}
    />
  );
}
And pass to the editor an onChange method. The onChange method gets called whenever the editor content changes. It gets called with a new editorState object, containing the new changes. So all we do is take that new editorState and set our state.editorState.
onChange = (editorState) => {
  this.setState({
    editorState,
  });
}
So now our Editor should work as usual. We’re not using any plugins yet, so this just behaves like the default draft js editor.
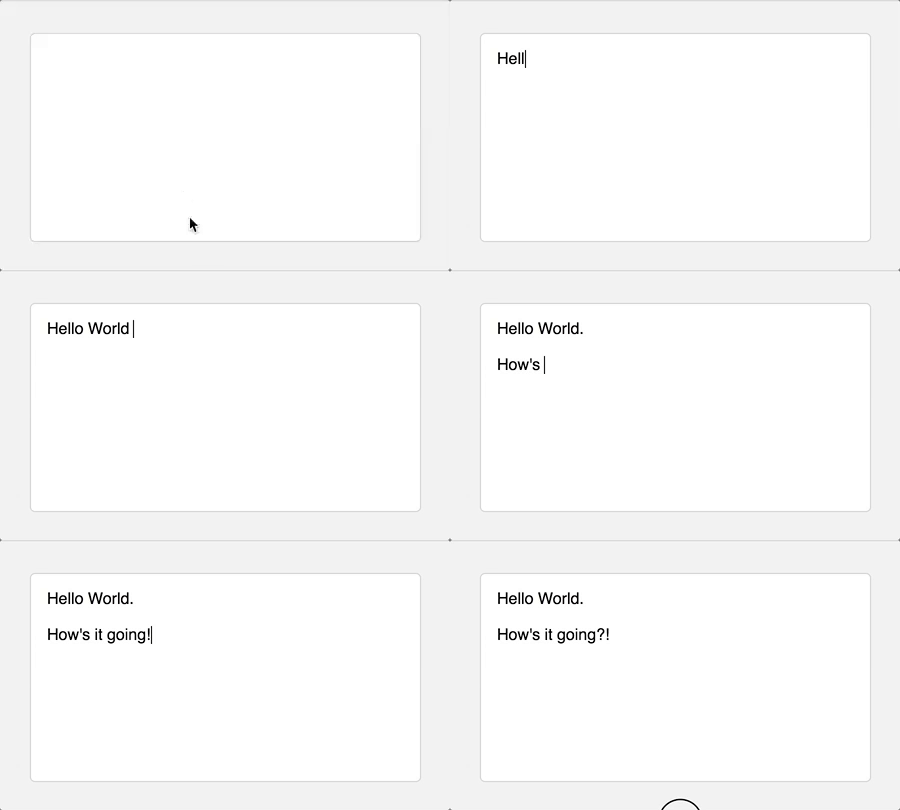
Easy peasy. Now - even easier, let’s add some plugins.
Adding plugins
draft-js-plugins makes this process very frictionless. To see all available plugins, simply go to the draft-js-plugins homepage and pick one.
I’m picking the emoji plugin for starters. I’d recommend using the latest version of the editor and its plugins - 2.0.0-rc2.
yarn add draft-js-emoji-plugin@2.0.0-rc2
Now let’s use the plugin, here’s the current state of my App.js:
import React, { Component } from 'react';
import { EditorState } from 'draft-js';
import Editor from 'draft-js-plugins-editor';
import createEmojiPlugin from 'draft-js-emoji-plugin';
import 'draft-js-emoji-plugin/lib/plugin.css'

const imagePlugin = createImagePlugin();

const { EmojiSuggestions } = emojiPlugin;

class App extends Component {
  constructor(props) {
    super(props);
    this.state = {
      editorState: EditorState.createEmpty(),
    }
  }

  onChange = (editorState) => {
    this.setState({
      editorState,
    });
  }

  render() {
    return (
      <div>
        <Editor
          editorState={this.state.editorState}
          onChange={this.onChange}
          plugins={[emojiPlugin]}
        />
        <EmojiSuggestions />
      </div>
    );
  }
}

export default App;
#934e413d57a89f5ec049872b2a33af854f38e4e2
First I import the emoji plugin and then the styles for the emoji plugin, then I create an instance of the plugin (for every editor instance you’ll need a new plugin instance).
const imagePlugin = createImagePlugin();
And then I simply pass the plugin to the plugins prop of the editor:
<Editor
  editorState={this.state.editorState}
  onChange={this.onChange}
  plugins={[emojiPlugin]}
/>
And voila, now I simply type : (like in slack) and I have an autocomplete pop up with suggestions for emojis. Pretty neat huh!
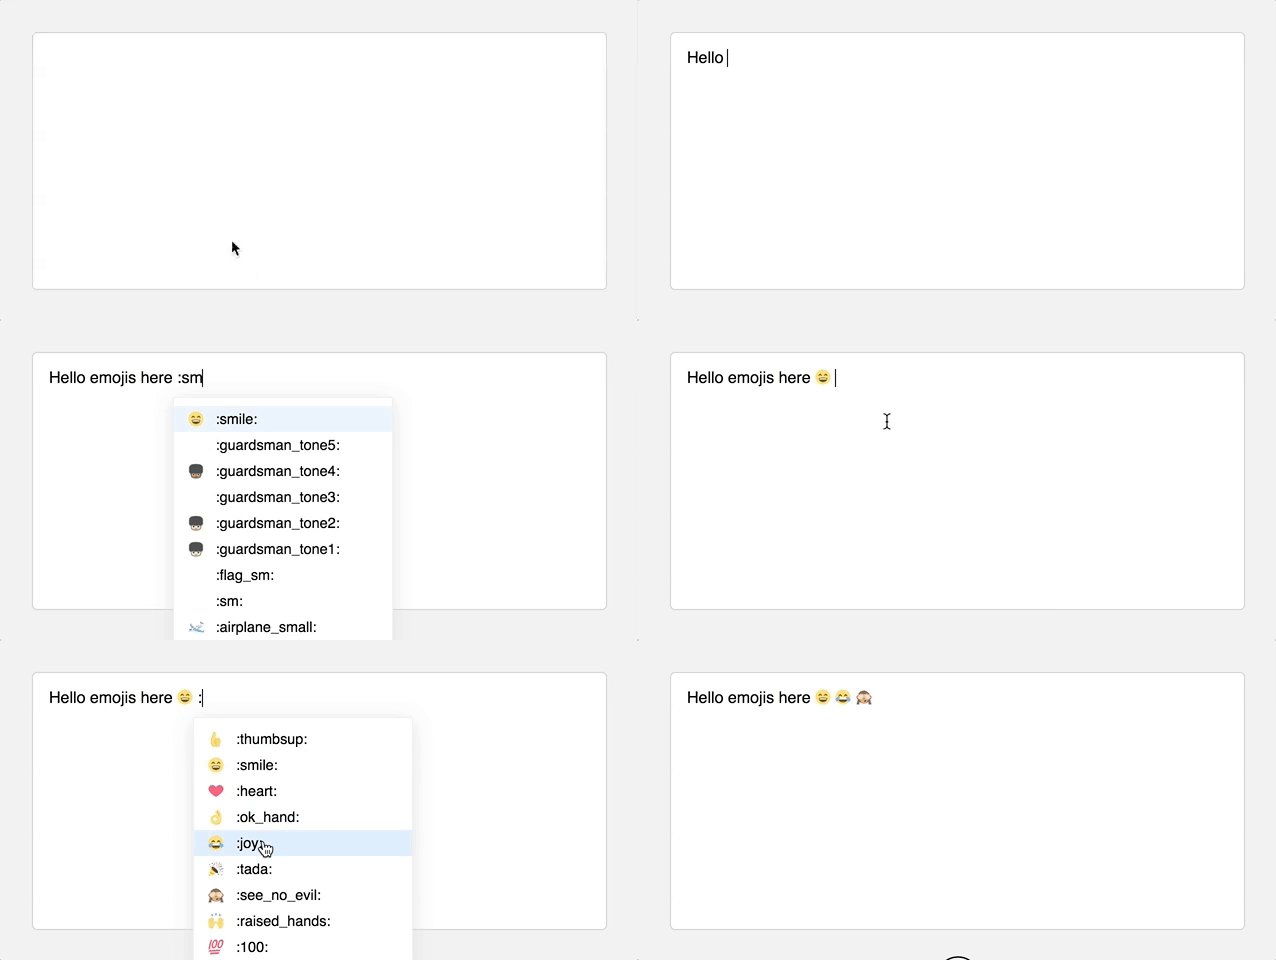
All plugins work in a similar manner, and draft-js-plugins is full of useful functionality. But two illustrate my other point, let’s write a draft-js plugin by ourselves.
Writing a draft-js plugin
We’re going to write a plugin for highlighting text with a key combination. Whenever the user selects text and presses commnand + h, it should highlight the text with a colored background. As promised, draft-js-plugins makes it fairly easy to extend your editors functionality without coupling. So what we’re doing is create a new module - highlightPlugin. I’m creating a folder for this, so I can then publish it to npm - why not!
Here’s the code for my plugin, I’ll go through it step by step:
import  { RichUtils } from 'draft-js';

export default () => {
  return {
    customStyleMap: {
      'HIGHLIGHT': {
        background: 'blue',
        padding: '0 .3em',
        color: '#fff',
      }
    },
    keyBindingFn: (e) => {
      if (e.metaKey && e.key === 'h') {
        return 'highlight';
      }
    },
    handleKeyCommand: (command, editorState, { setEditorState }) => {
      if (command === 'highlight') {
        setEditorState(RichUtils.toggleInlineStyle(editorState, 'HIGHLIGHT'));
        return true;
      }
    },
  };
};
#e25f78be560ff2719bda4123f24dfd886582eaa6
First I import the RichUtils library, this has a method for toggling inline styles, which is what we want.
import { RichUtils } from 'draft-js';
Then I create a function to generate the plugin. Wrapping the plugin in a function has multiple benefits: - It gives us an opportunity to configure the plugin before use. - We need a new plugin for every editor instance. This covers that use case.
The plugin is simply an object containing editor props. We want to use a few props for our highlight plugin. Since we’re adding an inline style, we need to add a custom style map:
customStyleMap: {
  'HIGHLIGHT': {
    background: 'blue',
    padding: '0 .3em',
    color: '#fff',
  }
},
This will contain the css rules for our inline style. I’m styling our highlighted text with a blue background, white text and a little left and right padding.
Then I want to issue an editor command whenever a user hits command + h - so I add the keyBindingFn callback prop. The keyBindingFn method gets called for every key press. This provides an opportunity for us to return a new key command, we’ll call it highlight. If we don’t return a key command, draft-js-plugins will automatically fall back to the default draft-js key handling. Read more about keyBindings here.
keyBindingFn: (e) => {
  if (e.metaKey && e.key === 'h') {
    return 'highlight';
  }
},
Now that we’re returning a key command for our key combination, we can handle it with the handleKeyCommand callback.
handleKeyCommand: (command, editorState, { setEditorState }) => {
  if (command === 'highlight') {
    setEditorState(RichUtils.toggleInlineStyle(editorState, 'HIGHLIGHT'));
    return true;
  }
},
The plugins editor calls every callback as the normal draft-js editor does with one difference: A bonus argument, which contains a bunch of very useful methods:
{
  getPlugins, // a function returning a list of all the plugins
  getProps, // a function returning a list of all the props pass into the Editor
  setEditorState, // a function to update the EditorState
  getEditorState, // a function to get the current EditorState
  getReadOnly, // a function returning of the Editor is set to readOnly
  setReadOnly, // a function which allows to set the Editor to readOnly
  getEditorRef, // a function to get the editor reference
}
You may think that’s a bit too powerful for your taste. But if you’ve developed with draft-js before you’ve probably been frustrated by not having editorState and other parts of the editor easily accessible. This is what makes draft-js-plugins truly pluggable, that the entire editor functionality is exposed to plugins. Note that you can interact with other plugins as well - Composition ftw!
So back to our handleKeyCommand callback: We simply check if our command string matches ‘highlight’ and then we execute our RichUtils.toggleInlineStyle method, with the editorState as well as the name of our style 'HIGHLIGHT'. When we’ve handled a key command, we need to let draft-js know, so we return either the string 'handled' or true.
Finally, we need to import our highlight plugin creation function:
import createHighlightPlugin from './highlightPlugin';
generate the plugin:
const highlightPlugin = createHighlightPlugin();
And add it to our plugin editor
<Editor
  editorState={this.state.editorState}
  onChange={this.onChange}
  plugins={[highlightPlugin, emojiPlugin]}
/>
And now we’re done, we have our first draft-js plugin, see it working in all it’s glory, alongside the emojis plugin:
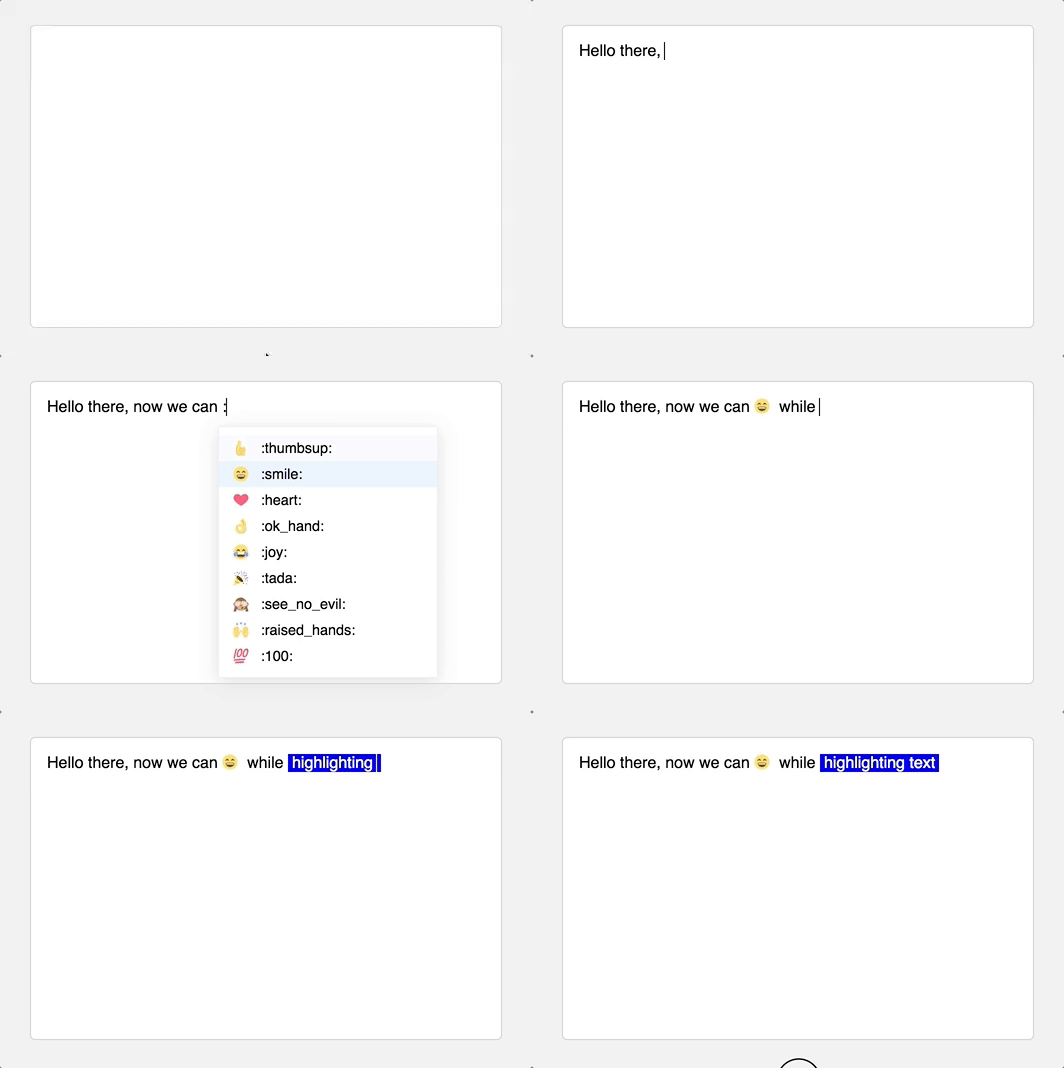
Before we close off, let’s add some configuration, so you can change the highlight style to match your favorite colour. Here’s how our plugin creator function looks like with added configuration:
import  { RichUtils } from 'draft-js';

const defaultStyle = {
  background: 'blue',
  padding: '0 .3em',
  color: '#fff',
};

export default (style = {}) => {
  return {
    customStyleMap: {
      'HIGHLIGHT': {
        ...defaultStyle,
        ...style,
      },
    },
    keyBindingFn: (e) => {
      if (e.metaKey && e.key === 'h') {
        return 'highlight';
      }
    },
    handleKeyCommand: (command, editorState, { setEditorState }) => {
      if (command === 'highlight') {
        setEditorState(RichUtils.toggleInlineStyle(editorState, 'HIGHLIGHT'));
        return true;
      }
    },
  };
};
I define the defaultStyle as a separate variable an extend it with the style object, an argument that you can pass into the plugin generator.
Now I can configure the plugin in the App.js module:
const highlightPlugin = createHighlightPlugin({
  background: 'purple'
});
#56e9cb260488b2a3f8fa0b67c86a6531545cb922
And here we are, the highlights are purple now:
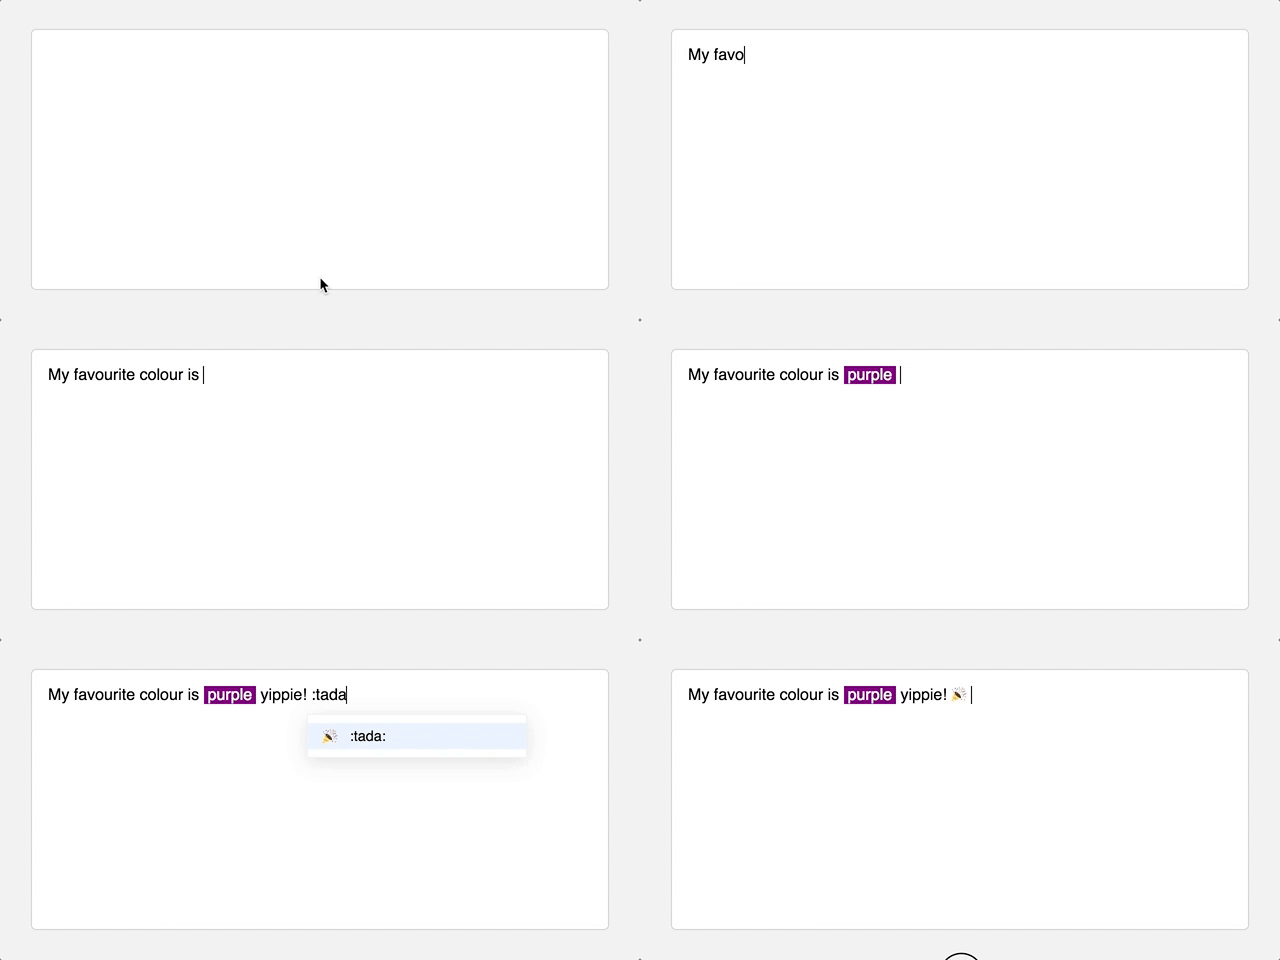
Right. That’s it. For giggles. I published the plugin on npm. As always, feel free to reach out.
And don’t forget to join the community online. There’s plenty of friendly folks on the draft-js slack and there’s also a draft-js channel on reactiflux. Come on and say hi!